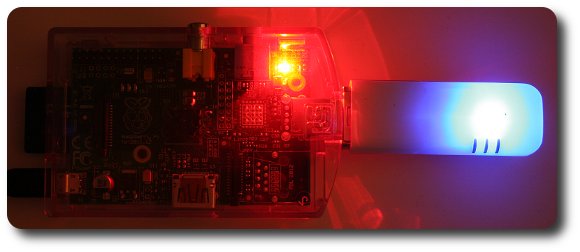
Raspberry Pi Model A connected via UMTS!
I’ve bought a relatively cheap, used ‘MEDIONmobile’ UMTS stick on Ebay and I’ve separately purchased a ‘Aldi Talk Starter Pack’ at a German Aldi market.
Aldi offers a tariff with 150MB UMTS speed and thereafter GPRS speed, for 3.99€ a month with a possibility to cancel the contract monthly.
It will ‘only’ used the E-Plus network, but that is relatively well available on my location.
short summary: what was necessary to go online?
- install wvdial
- modify /etc/wvdial.conf
- creating a Batch script with 2 lines, to set the SIM card password
- customize /etc/network/interfaces
- open connection
1. install wvdial
pi@raspberrypi - $ sudo apt-get install wvdial
.
.
Success!  You can run "wvdial" to connect to the internet.
  (You can also change your configuration by editing /etc/wvdial.conf)

pi@raspberrypi - $
2. modify /etc/wvdial.conf
For this, a little bit of preliminary work is necessary.
It is important to know something about the path through which the UMTS device will be addressed.
After plugging the stick – enter the command ‘lsusb’ to see whether the key has been detected.
pi@raspberrypi ~ $ lsusb
Bus 001 Device 005: ID 12d1:1003 Huawei Technologies Co., Ltd. E220 HSDPA Modem / E230/E270/E870 HSDPA/HSUPA Modem
pi@raspberrypi ~ $
Attention: In the Raspberry Pi Model B it didn’t work to insert the stick directly into the Pi, since my power supply wasn’t strong enough. (I’ve used a 5Volt 700mA power supply.)
But the operation via a USB hub went smoothly.
The Model A can handle it, probably because they self consumes by default less power.
The last entries in /var/log/messages, will show the path through which the UMTS modem is added.
In my case: /dev/ttyUSB0.
Feb 20 15:17:26 raspberrypi kernel: [   10.527167] usb 1-1.3: new high-speed USB device number 5 using dwc_otg
.
.
Feb 20 15:17:26 raspberrypi kernel: [   11.313066] usbcore: registered new interface driver option
Feb 20 15:17:26 raspberrypi kernel: [   11.323480] USB Serial support registered for GSM modem (1-port)
Feb 20 15:17:26 raspberrypi kernel: [   11.334289] option 1-1.3:1.0: GSM modem (1-port) converter detected
Feb 20 15:17:26 raspberrypi kernel: [   11.345030] usb 1-1.3: GSM modem (1-port) converter now attached to ttyUSB0
Feb 20 15:17:26 raspberrypi kernel: [   11.354849] option 1-1.3:1.1: GSM modem (1-port) converter detected
Feb 20 15:17:26 raspberrypi kernel: [   11.375418] usb 1-1.3: GSM modem (1-port) converter now attached to ttyUSB1
Now I’ve configured the /etc/wvdial.conf for my ‘Aldi – Medionmobile’ access.
pi@raspberrypi /etc $ cat wvdial.conf
[Dialer Defaults]
Phone =
Username =
Password =
New PPPD = yes

[Dialer eplus]
Modem = /dev/ttyUSB0
Phone = *99#
Username = eplus
Password = gprs
Init3 = AT+CGDCONT=1,"IP","internet.eplus.de","0.0.0.0"
ISDN=0
Auto Reconnect=on
Stupid Mode=off
Idle Seconds=0
Auto DNS=on
3. creating a Batch script with 2 lines, to set the SIM card password
Who has secured the SIM card with a PIN, must ensure that the UMTS modem knows these PIN, before dialing.
Therefore serves the following bash script:
pi@raspberrypi /usr/local/bin $ sudo cat setPIN.sh
#!/bin/sh
echo "AT+CPIN=4711\n\r" > /dev/ttyUSB0
And now make sure so that only Root may have a look inside.
pi@raspberrypi /usr/local/bin $ ls -al
insgesamt 352
-rwx--x--x  1 root staff     50 Feb 24 13:14 setPIN.sh
4. /etc/network/interfaces anpassen
Finally, 4 lines coming into the /etc/network/interfaces.
pi@raspberrypi - $ sudo cat /etc/network/interfaces ab auto ppp0
auto lo

iface lo inet loopback
iface eth0 inet dhcp

auto ppp0
iface ppp0 inet wvdial
provider eplus
pre-up /usr/local/bin/setPIN.sh

allow-hotplug wlan0
iface wlan0 inet manual
wpa-roam /etc/wpa_supplicant/wpa_supplicant.conf
iface default inet dhcp
pre-up /usr/local/bin/setPIN.sh -> refers to the script for PIN transfer.
5. open connection
The connection builds up automatically immediately after booting, assuming that the Stick is plugged.
Independent of the automatically solution, the connection can be established and closed, with the the following commands:
pi@raspberrypi - $ sudo ifup ppp0
pi@raspberrypi - $ sudo ifdown ppp0

