
Tag: homemade
blades VAWT Visually :-)
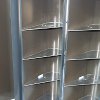
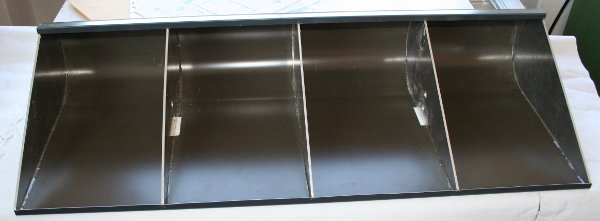
The pictures show the construction of the wings quite well.
It is best to click on the first one to enlarge it and then use the arrow to the right to view one image at a time.
Under each picture there is a brief explanation.


Material selection and fitting
I have decided for aluminum because it is light, weather resistant and easy to process. For the wings, aluminum was used, as is also seen on many roofs. I chose a dark (brown) color because I would not want to someone is being blinded with the windmill. If the sun is unfavorably reflected, that is not good.
The connection between wing plate and profile plates was glued with UHU Endfest 300.
(After half a year of continuous operation and a survived winter, I must say that the glue is not suitable!)
I have concentrated too much on the fact that the windmill can withstand strong wind and I was mainly concerned to use an adhesive with an extremely high bond force.
But UHU Endfest is rigid. A flexible adhesive is more suitable. I will bond the profiles again with a good silicone and test the next winter.
!—The profiles hold with Endfest of UHU, but I see smaller cracks after half a year—!
Größe und Maße
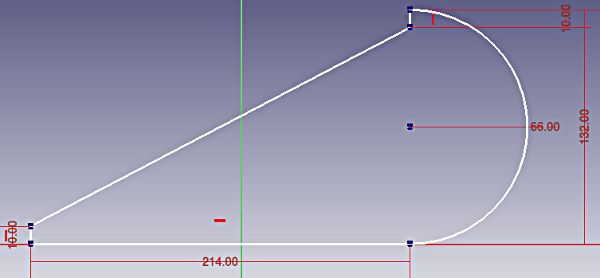 The size of the wing profiles is derived from the preliminary considerations of the page Dimensioning – own construction VAWT vertical axis wind turbine.
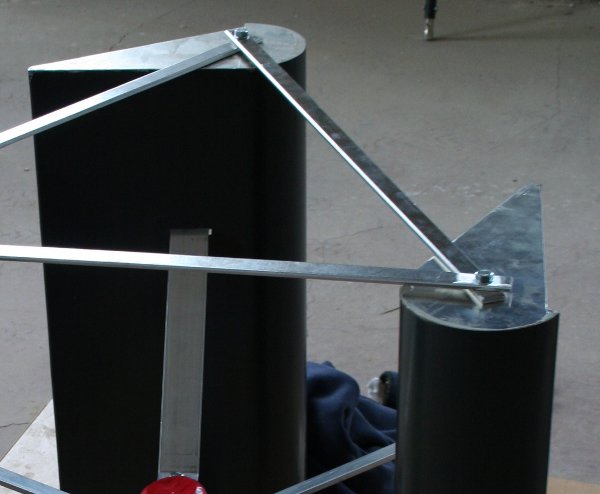
I have transferred the enclosed drawing to 3mm thick aluminum sheet and sawn using a decuping saw with sawblades for soft metal.
With a little patience, this goes quite well.
2 profiles per wing, were still provided with 2 holes (9mm diameter) to allow connection to the bracket at the hub.
Another 2 profiles per wing each received a 9mm hole in the center of the circle arc to reinforce the profiles on the top and bottom of the wing.
selfmade VAWT
On these pages, I am about to document the construction of a vertical axis wind turbine.
So far here I have always logged my activities, when I have worked on it.
more detailed information you can find on this pages:
As a first impression here times a video, which shows the wind wheel in operation.
It is a vertical – axis wind turbine based on the model of a Lenz2.

Homemade electricity generator for low speeds
Why build a generator yourself when everything can be bought somewhere?

- The only thing I learn from buying is spending money
- I was unable to find a generator that could generate significant voltage and current at low revolutions of approx. 100 * min-1
- The generator should be used in a Stirling engine and possibly in a vertically running wind turbine, which does not bring the highest speeds
- The generator must also be usable as a motor in order to start a Stirling engine
- The generator has to run very lightly in order to keep losses low, i.e. no sliding contacts and no jerking, as with a bicycle dynamo
- For use in the Stirling engine, the generator should also represent the flywheel mass, which means that it must have a certain torque
- The test generator has to withstand my sons’ attempts to play :-)
- The construction must be simple and it must be possible to assemble it without complex special tools
In the following I log a little what I tried to get as close as possible to the goal, which at first glance seems unrealistic. (Neukirchen in April 2009)
| experiment | Power in watts | rotation speed |
| Wooden Generator 1 exp. 2 | 0,0085 | fast |
| Wooden Generator 1 exp. 3 | 0,231 | fast |
| Kreissägeblatt Generator Exp. 1 | 1,6 | rpm |