Categories
Python

Python – remove oldest files in a directory, only a defined count of them remains

By experimenting with the Pi camera and PIR at may Raspberry Pi were quickly many images written to the SD card.

In order to get some control, the following Python Script is a good basis.
There is the possibility to specify a directory and the maximum number of files stored in it.

Exceeds the number of files the defined value, older files are deleted.

In my case, I always keep a maximum of 1000 images in the folder.

Sample code:

#!/usr/bin/python
 
import os
 
path = "/home/pi/pictures/"
max_Files = 1000
 
def sorted_ls(path):
    mtime = lambda f: os.stat(os.path.join(path, f)).st_mtime
    return list(sorted(os.listdir(path), key=mtime))
 
del_list = sorted_ls(path)[0:(len(sorted_ls(path))-max_Files)]
 
for dfile in del_list:
    os.remove(path + dfile)
Categories
Stirling Engine

Solar Low Temperature Stirling Engine

A very interesting project to build in the student of grade 7/8 a Stirling engine for watering your school garden.
All this is supported with many images, PDF files and an easily understandable theory.
An ideal project for more school gardens and a nice resource for personal knowledge base.

… 12 students of the Montessori High School have done something very special. They want to water their school garden with innovative technology. In cooperation with the Stirling Institute of Technology a non-profit company from Potsdam will to be built a solar low temperature Stirling engine. The invention is based on the patent of the Institute with the no. 100 16 707.

http://s-tip.org/html/for_mont.htm#studienarbeit

Categories
Raspberry Pi

Raspberry Pi – setting up WIFI via the command line

Link to a official instruction manual, how you can setup access to your home wifi, in few and well understandable steps.
http://www.raspberrypi.org/documentation/configuration/wireless/wireless-cli.md

The WIFI stick was detected from my linux automatically without problems.

Maybe a little bit better is the following explanation:
http://weworkweplay.com/play/automatically-connect-a-raspberry-pi-to-a-wifi-network/

Categories
Raspberry Pi

Raspberry Pi – homemade level converter for serial communication rs232 3.3 volts to 5 volts TTL for AVR microcontroller

I found that the Raspberry Pi serial interface rs232, described in a older post by myself, was too bulky.

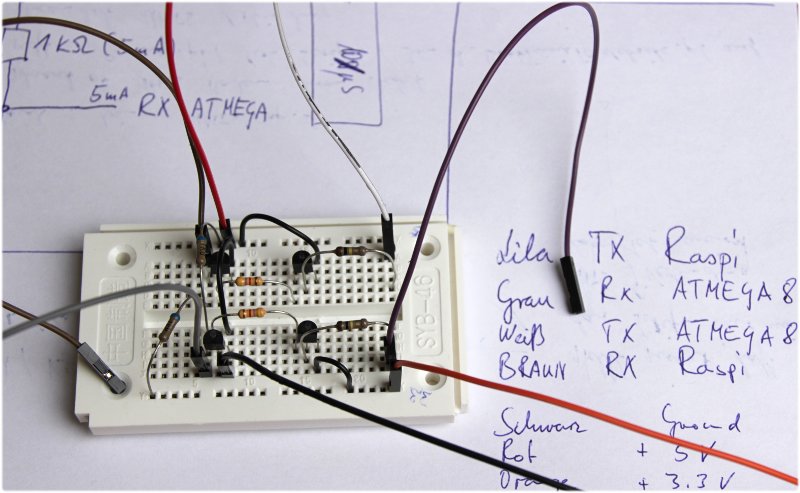
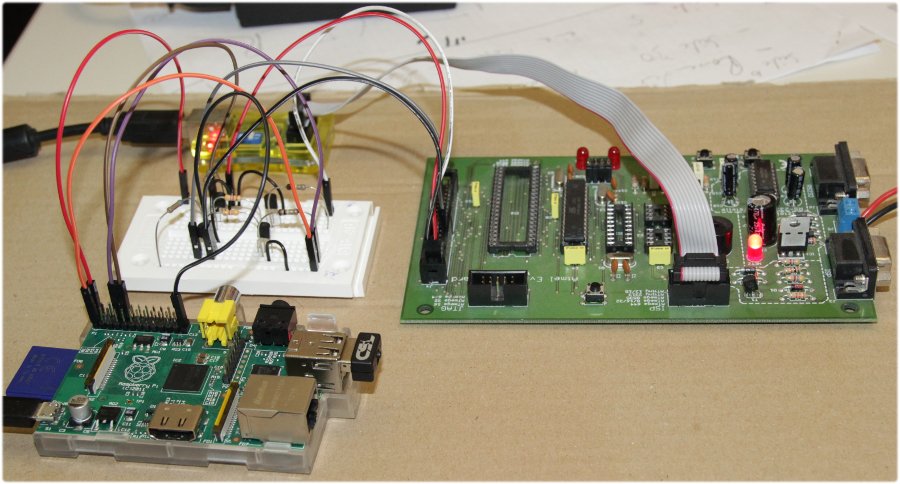
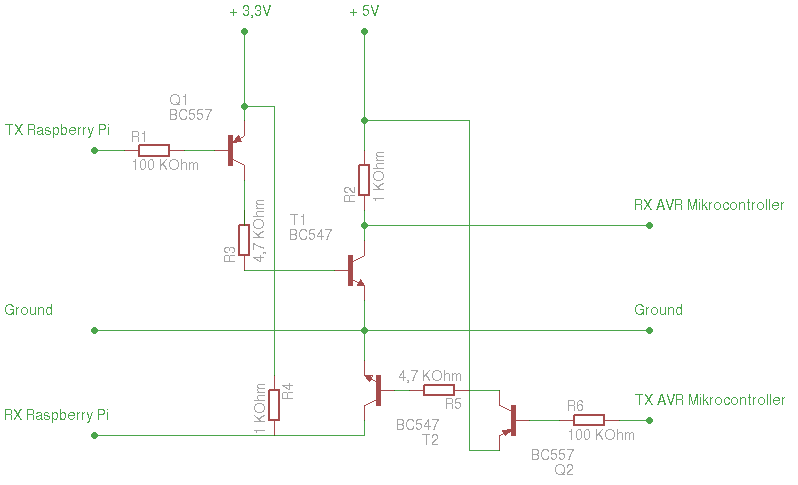
Pi and AVR should be connected through a less amount of wires.

So I’ve searched the best hints to solder a cheap and uncomplicated level converter, that can directly be connected between the GPIO of the Pi and the rx/tx pins of the microcontroller.

On the German website http://www.elektronik-kompendium.de/sites/praxis/bausatz_pegelwandler-mit-transistoren.htm I found a useful circuit with transistors and resistors that I had in my toolbox. (something similar but also matching parts)

The following images are showing my circuit diagram and the test setup.

The first test worked flawlessly both in the direction to the Pi and in the direction to AVR microcontroller.

Eigenbau_Pegelwandler_2Eigenbau_PegelwandlerSchaltplan_Pegelwandler_Raspberry_Pi_TTLEigenbau_Pegelwandler_3

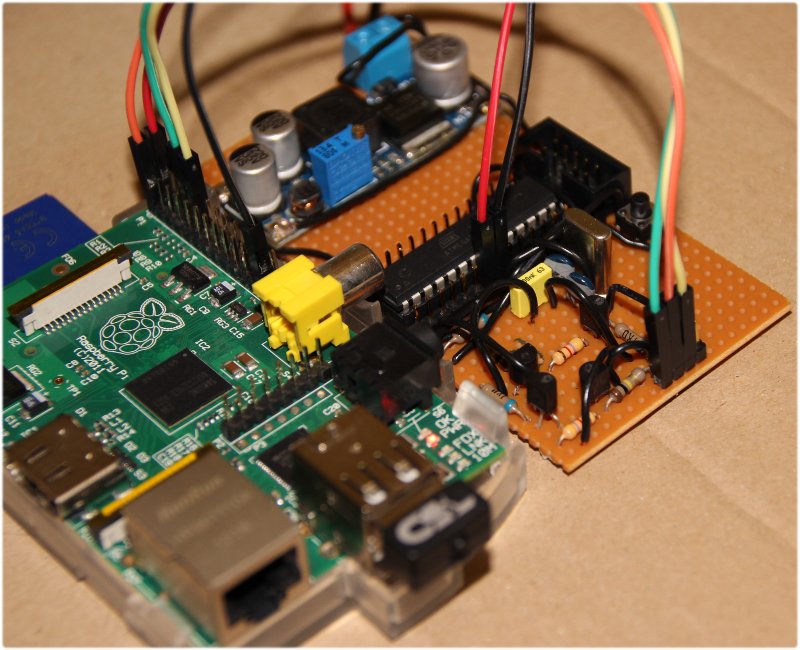
The third picture shows the circuit diagram used and the fourth image the development on breadboard. Now I can connect my test board and the Pi over normal jumper cable to have hanging around without various additional boards.

Categories
programming

(Deutsch) Eclipse – Programmierumgebung dunkel machen

Sorry, this entry is only available in German.

Categories
Raspberry Pi

Raspberry Pi – using the serial interface (RS232)

The Raspberry Pi is equipped with many interfaces.
And the possibilities can rise more than exponentially by using of the USB port.
But to communicate with AVR microcontrollers is the best suited way by using a serial interface.
Of course, the Raspberry Pi A has a serial interface, but unfortunately merely as pins on the GPIO connector.

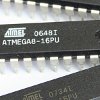
The required pins, could be connected theoretically directly to the microcontroller eg. ATMega8.
But that would require that the microcontroller operates at 3.3 volts.
My Pollin evaluation board works with 5 volts, but is made with a complete RS232 interface for communication with PC or other equipment.
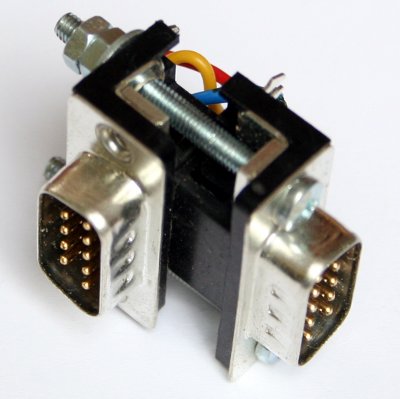
The easiest way would it be, when the Pi would have an RS232 interface like a PC with the same connectors and signal levels.
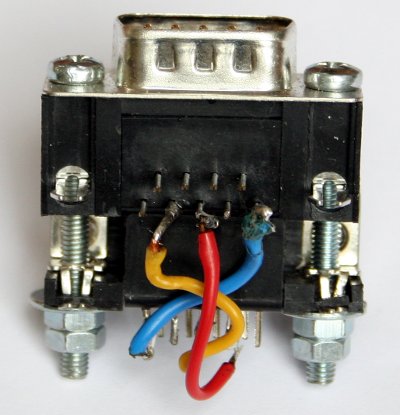
By Googling I’ve found the website Serial Port Add On.
The described Serial Port to TTL Digital Converter Module there, I’ve bought at Ebay.

GPIO Header Pins
RaspberryPI_GPIO_serielle_Schnittstelle
2 4 6 8 10 12 14 16 18 20 22 24 26
1 3 5 7 9 11 13 15 17 19 21 23 25
1= 3.3V, 9= GND, 8= TX, 10= RX

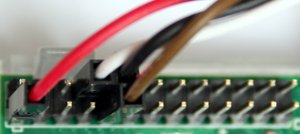
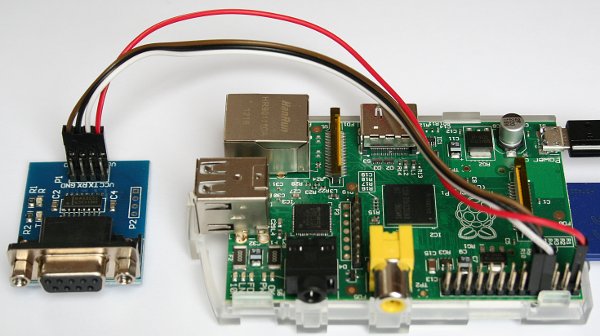
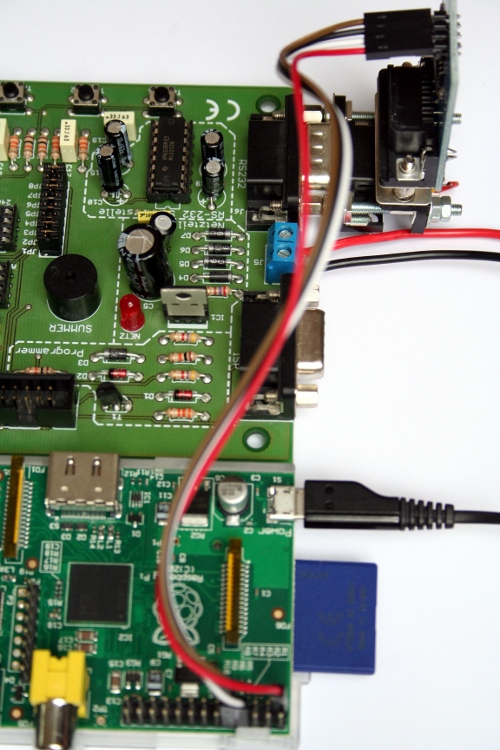
The jumper cables to connect to the Raspberry Pi were included in the delivery.
I’ve connected the module with the Pi, as shown in the picture below.

To get the serial interface up and running, are some changes in/etc/inittab and /boot/cmdline.txt necessary.

/etc/inittab

  • comment line: ‘T0:23:respawn:/sbin/getty -L ttyAMA0 115200 vt100’
#Spawn a getty on Raspberry Pi serial line
#T0:23:respawn:/sbin/getty -L ttyAMA0 115200 vt100

/boot/cmdline.txt

  • delete of: dwc_otg.lpm_enable=0 console=ttyAMA0,115200 kgdboc=ttyAMA0,115200 console=tty1 root=/dev/mmcblk0p2 rootfstype=ext4 elevator=deadline rootwait
dwc_otg.lpm_enable=0 console=tty1 root=/dev/mmcblk0p2 rootfstype=ext4 elevator=deadline rootwait

pictures of my PI inclusive ‘serial device’

RaspberryPI_mit_serieller_Schnittstelle_VS RaspberryPI_GPIO_serielle_Schnittstelle1_VS RaspberryPI_GPIO_serielle_Schnittstelle2_VS RaspberryPI_GPIO_serielle_Schnittstelle3_VS RaspberryPI_GPIO_serielle_Schnittstelle4_VS

Video, for Demonstration

The video is already on my ‘Hello World Example’ in the ATMega8 area of my website in use.

For that I’ve written a little perl script. Surely it is possible to use programs like minicom, but I dont wanted to spend the time to familiarize myself with a new tool.
The script was written faster and from my perspective it’s much more flexible for further use and for experiments.

Categories
ATMega8

(Deutsch) ATMega8 – Registerinhalte auf dem Mikrocontroller über serielle Schnittstelle steuern

Sorry, this entry is only available in German.

Categories
ATMega8

(Deutsch) ATMega8 – LED’s des Pollin Evaluationboards über die serielle Schnittstelle steuern

Sorry, this entry is only available in German.

Categories
ATMega8

(Deutsch) ATMega8 – Hello World über serielle Schnittstelle senden

Sorry, this entry is only available in German.

Categories
ATMega8

(Deutsch) ATMega8 – LED 1 und 2 über Taster T1 und T2 schalten

Sorry, this entry is only available in German.